所有代码挂在我的github上,例子是demo6.html,DIY/4/_underscore.js.欢迎fork,star。
https://github.com/zrysmt/DIY-underscorejs
这一部分来DIY两个经常被使用的函数(或者说分析其源码),分别是throttle(节流函数)和debounce(防反跳函数)。
这两个函数特别适合一些场景:事件频繁被触发,会导致频繁执行DOM的操作,如下:
- window对象的resize、scroll事件
- 拖拽时候的mousemove事件
- mousedown、keydown事件
- 文字输入、自动完成的keyup事件
1.throttle节流函数
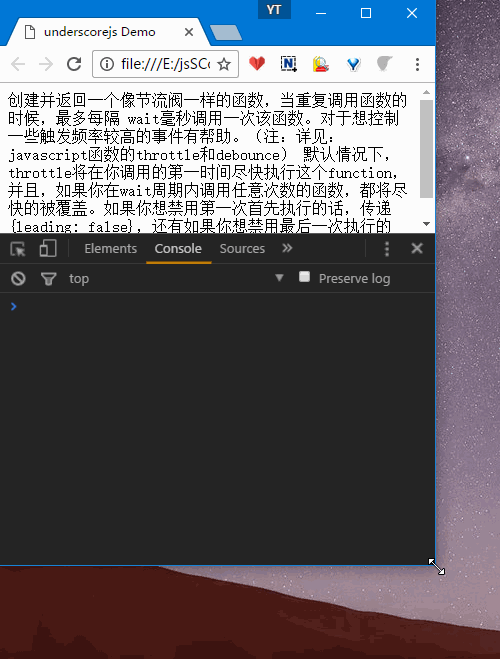
创建并返回一个像节流阀一样的函数,当重复调用函数的时候,最多每隔 wait毫秒调用一次该函数。对于想控制一些触发频率较高的事件有帮助。
默认情况下,throttle将在你调用的第一时间尽快执行这个function,并且,如果你在wait周期内调用任意次数的函数,都将尽快的被覆盖。如果你想禁用第一次首先执行的话,传递{leading: false},还有如果你想禁用最后一次执行的话,传递{trailing: false}。
也许你还没完全看懂,我们来做个demo测试下。1
2
3
4
5
6
7
8
9
10
11
12
13
14
15
16
17
18<div id="div1">
创建并返回一个像节流阀一样的函数,当重复调用函数的时候,最多每隔 wait毫秒调用一次该函数。对于想控制一些触发频率较高的事件有帮助。(注:详见:javascript函数的throttle和debounce) 默认情况下,throttle将在你调用的第一时间尽快执行这个function,并且,如果你在wait周期内调用任意次数的函数,都将尽快的被覆盖。如果你想禁用第一次首先执行的话,传递{leading: false},还有如果你想禁用最后一次执行的话,传递{trailing: false}
</div>
<script>
function updatePosition() {
console.log($('#div1').height(), $('#div1').width());
}
//不带options即第三个参数的时候(默认情况下),会执行两次,一次是执行时候的状态(A) ,一次是执行后的状态(B)
// {leading: false }不会执行第一次执行时的状态(A)
// {trailing: false}不会执行最后一次执行后的状态(B)
var throttled = _.throttle(updatePosition, 1000
/*,{
leading: false,
trailing: false
}*/
);
$(window).resize(throttled);
</script>
我们先看结果,后看下部分的源码实现。
- 1.只拉动一次窗口,会响应两次
updatePosition,分别对应状态A、B,示例Demo中有详细说明解释第三个参数。
- 2.多次拉动窗口,第一次会立即响应,拖动比较快的时候,只会隔大概1000ms(自己设置的时间,默认100ms)响应一次。
源码实现:1
2
3
4
5
6
7
8
9
10
11
12
13
14
15
16
17
18
19
20
21
22
23
24
25
26
27
28
29
30
31
32
33
34
35
36
37
38
39
40
41
42
43
44
45_.throttle = function(func, wait, options) {
var timeout, context, args, result;
var previous = 0;
if (!options) options = {};
var later = function() {
previous = options.leading === false ? 0 : _.now();
timeout = null;
result = func.apply(context, args);
if (!timeout) context = args = null;
};
var throttled = function() {
var now = _.now();//加入_.now(),这里不在单说,相见开头处提供的github地址。
if (!previous && options.leading === false) previous = now; //禁止第一次执行(A) remaining = wait - 0 = wait > 0 的话不会执行A
//不禁止第一次执行A的时候,previous = 0,现在时间now >= wait,就是过了wait等待时间
var remaining = wait - (now - previous); //remaining 第一次为< 0
console.warn(wait, now, remaining);
context = this;
args = arguments;
//按理来说remaining <= 0已经足够证明已经到达wait的时间间隔,但这里还考虑到假如客户端修改了系统时间则马上执行func函数(remaining > wait)
if (remaining <= 0 || remaining > wait) {
if (timeout) {
clearTimeout(timeout);
timeout = null;
}
previous = now;
result = func.apply(context, args); //第一次执行A
if (!timeout) context = args = null;
} else if (!timeout && options.trailing !== false) { //不会禁用第二次执行(B)
console.log("============第二次===============");
timeout = setTimeout(later, remaining); //第二次执行(B)
}
return result;
};
throttled.cancel = function() {
clearTimeout(timeout);
previous = 0;
timeout = context = args = null;
};
return throttled;
};
2.debounce 防反跳函数
返回 function 函数的防反跳版本, 将延迟函数的执行(真正的执行)在函数最后一次调用时刻的 wait 毫秒之后. 对于必须在一些输入(多是一些用户操作)停止到达_之后_执行的行为有帮助。 例如: 渲染一个Markdown格式的评论预览, 当窗口停止改变大小之后重新计算布局, 等等.
传参 immediate 为 true, debounce会在 wait 时间间隔的开始调用这个函数 。
示例Demo1
2var debounce = _.debounce(updatePosition, 1000);
$(window).resize(debounce);
- 只会在停止操作后1000ms(自己设置的)执行
- 加入第三个参数,会在操作的同时执行
var debounce = _.debounce(updatePosition, 1000,true);
首先一个使用的工具函数,不在这里详细说明了。1
2
3
4
5
6
7 _.delay = restArgs(function(func, wait, args) {
return setTimeout(function() {
return func.apply(null, args);
}, wait);
var restArgs = function(func, startIndex) {
};
_.restArgs = restArgs;
源码实现:1
2
3
4
5
6
7
8
9
10
11
12
13
14
15
16
17
18
19
20
21
22
23
24
25
26
27
28
29
30
31//immediate默认为false
//只在最后一次关闭的时候,延迟后执行一次
_.debounce = function(func, wait, immediate) {
var timeout, result;
var later = function(context, args) {
timeout = null;
if (args) result = func.apply(context, args);
};
restArgs = _.restArgs; //增加
var debounced = restArgs(function(args) {
if (timeout) clearTimeout(timeout);
//控制timeout,一直拖动的时候会清除timeout,这样中间就不会执行了
if (immediate) {//immediate为true立刻执行
var callNow = !timeout;
timeout = setTimeout(later, wait);
if (callNow) result = func.apply(this, args);
} else {
timeout = _.delay(later, wait, this, args);
}
return result;
});
debounced.cancel = function() {
clearTimeout(timeout);
timeout = null;
};
return debounced;
};
好了就简单介绍到这里
所有代码挂在我的github上,例子是demo6.html,DIY/4/_underscore.js.欢迎fork,star。
https://github.com/zrysmt/DIY-underscorejs